9.1 Overview
This guide explains how to connect your Shopify store to your Checky Pro account.Once connected, Checky Pro will sync your store data in real time to provide insights, analytics, and reporting.
9.2 Requirements
- An active Checky Pro account
- Admin access to your Shopify store
- A stable internet connection
9.3 Log in to Checky Pro
- Go to https://app.checkypro.com/login
- Log in with your Checky Pro credentials
9.4 Enter Your Shopify Store URL
- Locate your Shopify store URL , it should look like:
- Paste it into the input field in Checky Pro
- Click Continue
9.5 Authorize Checky Pro in Shopify
- Log in to your Shopify Admin
- Go to Settings → Apps and sales channels
-
Click Develop apps
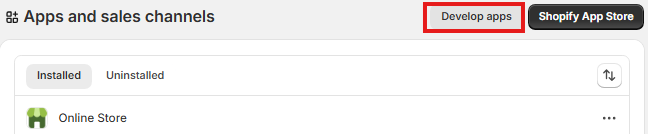
- Click Create an app
- Enter: Checky Pro as the app name
-
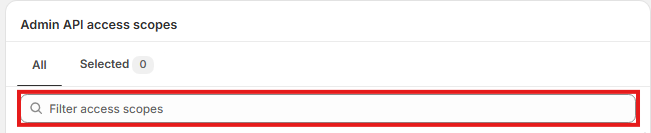
Click Configure Admin API scopes
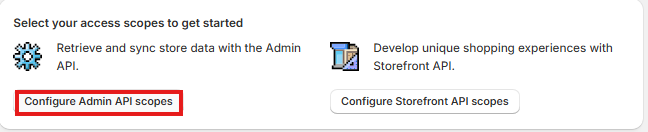
-
Select the following permissions:
Customers → Read & WriteDiscounts → Read & WriteDraft orders → Read & WriteOrders → Read & WriteProducts → Read & WriteThemes → Read & Write
- Click Save
-
Click Install app

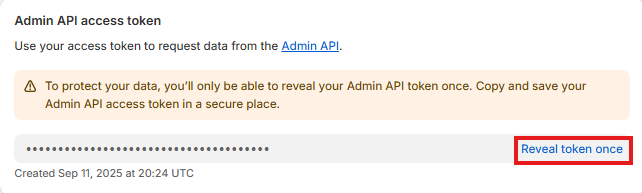
9.6 Copy API Credentials
- After installing the app, Shopify will generate credentials
- Copy the following:
- API Access Token
- API Key
- API Secret Key
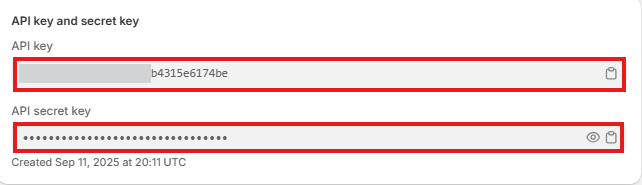
- Go back to CheckyPro and paste these values into the corresponding fields (Step 4 of the setup)
- Click Submit & Verify
Congratulations, you are all set!